[TIP] AMT 1:537 Enterprise Refit - Accurizing Docking Ports
Hi, Everyone!
For those of you who have the AMT / Lesney / Matchbox / ERTL / Round 2 1:537 Enterprise refit / -A kit, one of the many inaccuracies is the size of the docking ports behind the bridge, on both sides of the dorsal (neck), and on both sides of the secondary hull. The port at the bridge area is too small while the other four are too big. If you want to accurize those ports, I wrote up what I did.
Dorsal / Secondary Hull Docking Ports:
The molded ports are about 7/32 inches in diameter, and a more correct scale size would be about 5/32 inches (roughly 4 mm).
Back of Bridge Docking Port:
And that's it! Not too difficult.
Here are some helpful links:
As an example, below are some pictures using an AMT / Lesney 1:37 Enterprise refit (kit number S970) that I'm refurbishing. Check them out!
I hope this is useful.


For those of you who have the AMT / Lesney / Matchbox / ERTL / Round 2 1:537 Enterprise refit / -A kit, one of the many inaccuracies is the size of the docking ports behind the bridge, on both sides of the dorsal (neck), and on both sides of the secondary hull. The port at the bridge area is too small while the other four are too big. If you want to accurize those ports, I wrote up what I did.
Dorsal / Secondary Hull Docking Ports:
The molded ports are about 7/32 inches in diameter, and a more correct scale size would be about 5/32 inches (roughly 4 mm).
- Drill out the larger port which should leave a hole about 7/32 inches in diameter.
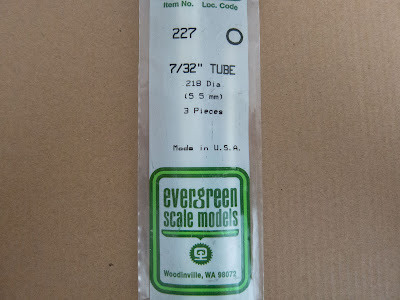
- Cut a 1/4 inch piece of an Evergreen Scale Models 227 7/32" (5.5 mm) diameter styrene tube and insert it into the hole.
- Move the tube until one end is about flush with outer surface of the dorsal or secondary hull part.
- Glue the tube from the inner surface of the dorsal or secondary hull part and wait for the glue to completely dry / cure.
- Cut a 1/2 inch piece of a Plastruct MR-160 5/32" (4 mm) diameter styrene rod and insert it into the Evergreen tube.
- Have the rod sunken in the tube on the outer surface of the dorsal or secondary hull part to give it the appropriate docking port look. Then glue the rod to the tube from the inner surface of the dorsal or secondary hull part and wait for the glue to completely dry / cure.
- Using your putty of choice, clean up the seam area between the tube and the outer surface of the dorsal or secondary hull part.
- With your scribing tool of choice, scribe a straight line down the center of the rod to add the detail of a closed docking port door.
Back of Bridge Docking Port:
- Drill out a 5/32 inch hole in the rear bridge docking port part.
- Cut a 1/8 or 1/4 inch piece of a Plastruct MR-160 5/32" (4 mm) diameter styrene rod and insert it into the hole.
- Have the rod sunken in the hole on the outer surface of the rear bridge docking port part to give it the appropriate docking port look. Then glue the rod from the inner surface of the rear bridge docking port part and wait for the glue to completely dry / cure.
- With your scribing tool of choice, scribe a straight line down the center of the rod to add the detail of a closed docking port door.
And that's it! Not too difficult.
Here are some helpful links:
- Evergreen Scale Models 227 7/32" (5.5 mm) diameter styrene tube - https://evergreenscalemodels.com/products/227-219-5-5mm-od-tubing
- Plastruct MR-160 5/32" (4 mm) diameter strene rod - https://plastruct.com/shop/strip-and-rod/90862-mr-160
- Chris Paveglio's "Constructing a Movie-Worthy Miniature - The U.S.S. Enterprise: Accurizing AMT's Enterprise Model" - http://www.paveglio.com/startrek/files/Enterprise.PDF
As an example, below are some pictures using an AMT / Lesney 1:37 Enterprise refit (kit number S970) that I'm refurbishing. Check them out!
I hope this is useful.


This comment has been removed by a blog administrator.
ReplyDelete